The Making of Going Postal
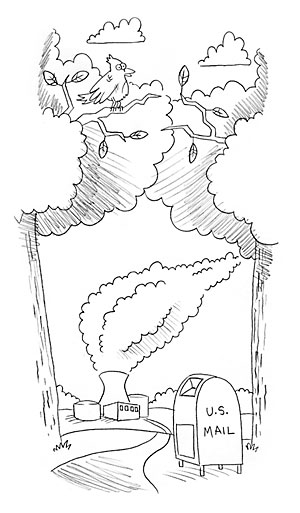
Pencil sketch of opening pan
I started working on Going Postal in the fall of 2000 and completed production in March of 2002. I did most of the work by myself and did everything by hand with the exception of the pencil testing, which was done on my computer using a great piece of software called FlipBook (external link).
This was my first film and it was a great learning process for me. In this article, I'll touch briefly on each of the stages I went through to complete the film. I'll also discuss the expectations and difficulties I encountered along the way.
Getting an idea
At the beginning of summer 2000, I decided to try my hand at animation. I signed up for a Fall course at The School of Visual Arts. According to the course description, students in the class would complete a one minute animated film and shoot it onto 16mm film. Three months before the course started, I decided to give myself a headstart on learning animation. I read some books, animated a bouncing ball and some walk cycles, and then made a 15 second Quicktime animation on my computer. The 15 second animation was based on a drawing I made two years earlier. The drawing shows a mailbox attacking a woman as she tries to mail a letter. In the animated version, a woman walks up to what appears to be an ordinary mailbox, but when she reaches out to open the mailbox it comes to life and eats her (and the letter). Needless to say, this was great fun to animate.

The first appearance of the carnivorous mailbox (from a self-promotional postcard).
As I worked on the Quicktime animation, I began to think about how the mailbox might move and locomote. I decided that it would probably hop, and made some rough sketches of what that would look like. I also pondered the origins of the man-eating mailbox and began to formulate a rough back-story in my mind.
As class approached, I decided that I would expand on this mailbox idea for my class film.
Storyboarding
Animated films rarely use scripts. Instead, they rely on storyboards for planning the story and action. A storyboard is similar to a comic strip, but minus the dialogue balloons. Also, storyboards have instructions and explanations for camera moves and sound effects written below and between the panels. The first thing we were required to do for my class was to create a storyboard.
As I worked on the storyboards, I began polishing up the designs of the mailbox and making model sheets for it. Since the other characters in the film only appear briefly, I didn't need model sheets for them. A model sheet is a series of drawings that show each character from many different angles and sometimes also include common facial expressions and physical gestures. Model sheets are used during the animation process to help keep the appearance of the characters consistent throughout the film.
Animation
With the storyboards finished, and the mailbox model sheets completed, I was ready to dive into the animation process. Looking at the length and complexity of my storyboards, I began to realize that my story was going to take more than one minute to tell. I was now estimating about four or five minutes. That's a lot of animation, so I decided to ease into things by doing some tests. I tried out some different ways of making the mailbox move, and once I was satisfied with my approach, I was ready to tackle the whole project.
I divided my film into four sequences and about 40 scenes. This enabled me to focus on one manageable bit of the animation at a time. As I prepared to animate each scene, I drew layouts. Layouts are rough drawings of each background that show where characters will be positioned in a scene and what paths they will follow to get from point A to point B. It's similar to the practice of putting marks on the stage in theater productions to show actors where to walk and stand. In this way, I progressed through the whole animation process one scene at a time. As I completed a bit of animation, I would test it out by scanning it into my computer and compiling it into an animation program. This is called pencil testing. It allows the animator to see mistakes in their work so they can be corrected before painting and shooting the film.
The whole animation process took about four or five months to complete. At that point, I was in the middle of my second semester of the animation class and was hopeful that I could still complete the film by early summer.
Ink & paint
This is the stage where things got bogged down. I underestimated the amount of work involved in the ink and paint process. Each animation drawing (about 2000 total), had to be hand inked onto a piece of clear acetate called a cel. Then, each cel had to be hand painted. The inking took just over a month and by late May I was ready to start painting. I assumed the painting might take a month or two at the most, but I was very wrong.
Cels are inked on the front and painted on the back. This prevents the paint from overlapping the ink lines. You can paint quickly and be a bit sloppy and as long as you don't cross completely over the ink line, everything will look great when you flip the cel over.
I set up an assembly-line system in my studio where I would paint one color onto a batch of cels at a time. As I finished each individual cel, I would place it on a set of shelves mounted over my drawing table. When the first color was painted onto all of the cels (usually about 30 at a time) the first cels I had painted would be dry and ready for the next color. It took me until mid-December to finish all 2000 cels!
Shooting and sound production
Finally, the cels were ready to be shot onto film and the end of this production was finally coming into view. I had completed three semesters of the animation course at SVA and had decided to finish up the film on my own. So at this point I was no longer taking an animation course. My next step was to find a camera I could rent to shoot the film. I decided to shoot my film onto 35mm film stock rather than a smaller gauge like 16mm because I had been told that film festivals prefer 35mm. Since I wanted to place my film on the festival circuit, that sealed my choice.
I found a camera and stand to rent in New York City. Since hiring an experienced camera operator can get very expensive, I decided to shoot it myself. This turned out to be even more grueling than cel painting. Motion picture film is very unforgiving. There is no "undo" button, so if you make a mistake you must completely reshoot the scene you goofed up. Since my film was over five minutes in length, and each second of film has 24 frames, there are more than 7200 frames in my film. Each of these frames had to be shot individually. The cels under the camera were changed every other frame. It took almost two weeks of full days to shoot the film (and re-shoot my mistakes).
Once the film was shot and edited it was time to design the sound. This was the final stage of production. Normally in animation, the sound mix is done before the animation so that the animation can be synched to the voices. Since there is no talking in my film, I was able to post sync the sound.
I found a recording studio in NYC and spent an afternoon there mixing sound. Most of the sounds came from the studio's library of sound effects. With computers, we were able to create some sounds by mixing and distorting existing sounds. For instance, the mailbox's roar is actually a distorted lion's roar. Other sounds were made in the recording booth by yours truly.
Final thoughts
The process of filmmaking has been very educational for me. I can't think of a better way to learn animation than to just dive in and make a film. I'm already in the planning stages for my next film and look forward to applying the lessons I have learned while making “Going Postal”.
If you are interested in trying your hand at animation, I have listed five of my favorite books below. These books will give you all of the basic information you'll need to get started.
Some recommended reading
- The Animation Book by Kit Laybourne
- Cartoon Animation by Preston Blair
- Animation: The Whole Story by Howard Beckerman
- The Animator's Survival Kit by Richard Williams
- Animation In The Home Digital Studio by Steven Subotnik